

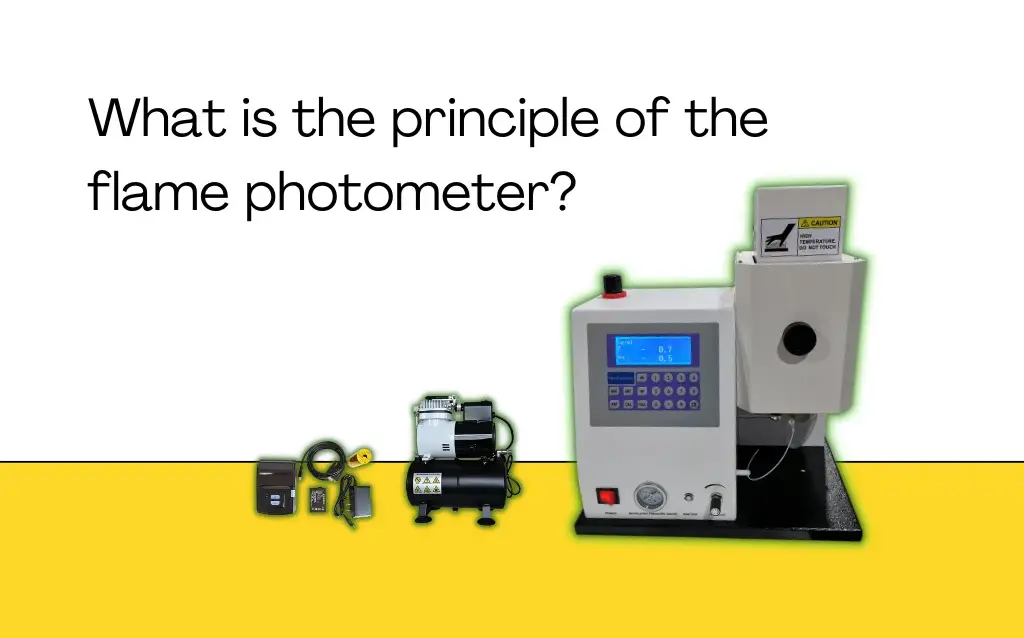
What is the principle of the flame photometer? How to use it?
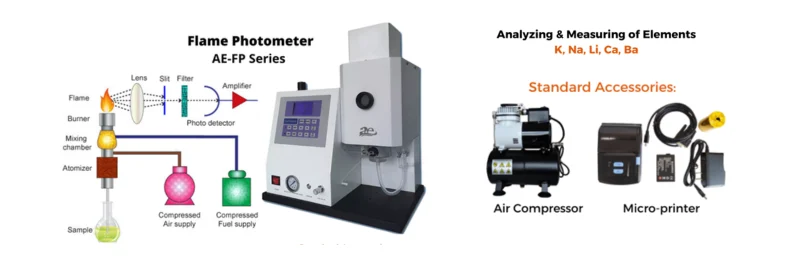
Flame photometer is an instrument for quantitative analysis of alkali metals and alkaline earth metals in samples based on the fact that the atoms or ions of the elements to be measured can emit their characteristic wavelength spectral lines after being excited by a flame, and on the basis of the Romagold formula.
1.What is a flame photometer?
The flame photometer itself does not give the absolute concentration of the element to be measured. A standard solution must first be prepared, calibrated, a standard curve drawn and then the unknown solution measured. After obtaining the reading displayed by the instrument, the corresponding concentration value is found on the curve, and the unknown concentration value of the measured substance can be obtained.
For example, when salt is placed in a flame, the flame light is yellow, which is due to the fact that the outer electrons of the sodium atoms in the salt have absorbed the thermal energy of the flame and jumped to the excited energy level. The characteristic wavelength spectral line – yellow spectrum (main wave 589.3nm). Using the thermal energy of the flame to make the atoms of a certain element to excite the characteristic spectrum, and using the instrument to detect the intensity of its spectral energy, and then quantitatively detect the content of the element in the substance, this kind of instrument is called flame photometer.
Flame photometer has the characteristics of high sensitivity, high selectivity, less samples required, fast analysis speed, has been widely used in medical clinic, soil, fertiliser, glass, ceramics, cement, refractory materials and so on.

2.What do I need to do before using the flame photometer?
2.1 Fuel
When using LPG, screw the gas connector with the ring gasket on the port or wrap the raw material tape around it. Connect the fitting to the outlet of the pressure reducing valve on the LPG storage tank with a 10mm thick gas pipe (purchased). Note: Both ends must be tied off so that there is no gas leakage. Then open the switching valve on the LPG storage tank and ignite it for use. Needle valve on the panel of the instrument to control the gas flow to control the flame size of the purpose, the gas on and off the instrument’s internal solenoid valve control.
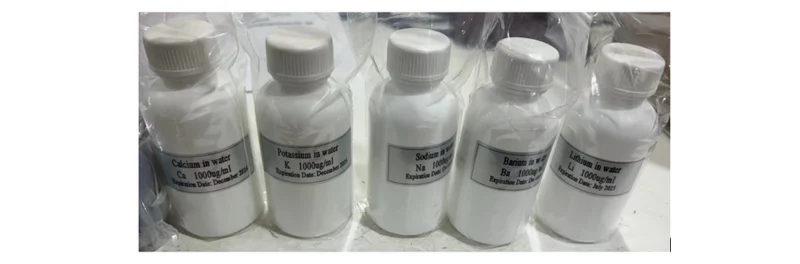
2.2 Solution (K, NA, LI, CA, BA standard solutions)
- a) Since the use of different distilled water as solvent in the preparation of the solution will result in different background values, it is desirable to use distilled water in the same container for the preparation and dilution of standards and samples in order to overcome this difference.
- b) Prepare the necessary test standard solutions according to the detection range of the instrument for relative determination.
3.Operate the machine.
3.1 Turn on the machine
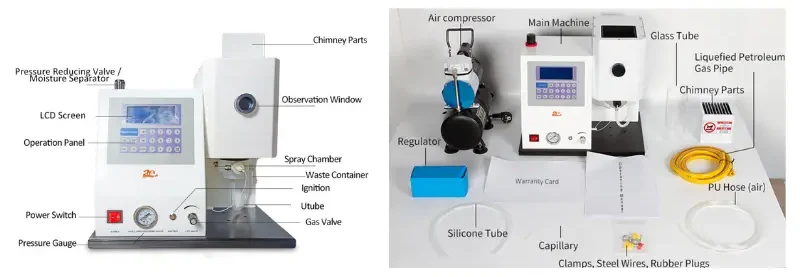
After installation as required, the glass cover is placed on the inside of the combustion chamber and can be connected to the power supply for operation. Plug in the air compressor and start the compressor, the pressure gauge will rise gradually. Pull up the adjusting knob on the air filter pressure reducing valve, and then turn the adjusting knob clockwise or anti-clockwise, the pressure can be adjusted to about 0.15MPa. Insert the pipette into the solution, the solution enters into the atomisation chamber with the pipette, and soon there is solution flowing out from the waste liquid dish, which indicates that the instrument is fed into the atomisation normally, and put a container under the waste liquid dish to collect the waste liquid.
Plug in the host power cord, open the power switch, set the chimney cover, and then open the switch on the liquefied petroleum gas cylinder, the gas valve will be rotated to the appropriate position when you press the ignition button, the instrument issued a reply to the ignition sound, from the observation window can be seen in the electric sparks, the fire lit, rotate the gas valve to adjust the height of the flame, so that the flame is a light blue taper flame, the instrument enters the preheating. If the fire can not be ignited, the instrument shows Err1, you can increase the gas valve opening, and then press the ignition button to re-light the fire, the gas valve is generally not needed after a use of re-adjustment, in use due to gas exhaustion or other reasons triggered by the extinguishing of the fire will be audible and visual alarm shows Err2 and automatically close the gas solenoid valve, to prevent the gas from overflowing.
3.2 Pre-heating
Next is the preheating phase. Since the combustion of the flame, the injection of the sample is a dynamic process. At first it is at room temperature, then it is a warming process, when the gas and the amount of sample is determined, the flame tends to thermal equilibrium, then the flame is more stable, the excitation energy is constant, and thus the readings are stable. The warm-up time is about 30 minutes, and it is better to use distilled water for continuous sampling, as this better simulates the actual sampling conditions. If the user has fewer samples and does not have the time, measurements can be made while calibrating to save fuel and time.
3.3 Turn Off
When switching off the appliance, turn off the LPG cylinder (turn clockwise), the flame will go out after the residual LPG in the pipeline is burnt out. Before switching off, please use distilled water to boil for about 5 minutes. After switching off the machine, the gas valve of the instrument does not need to be rotated, and the next time you use it, you only need to open the switch on the LPG cylinder and press the ignition button at the same time, and the flame state does not need to be adjusted, and there is a solenoid valve to control the opening and closing of the gas. When the fire can not be ignited, you can increase the amount of gas, and then adjust it after it is ignited.