


Introduction
In any laboratory setting, the Biosafety Cabinet (BSC) is one of the most critical pieces of equipment. It protects laboratory personnel, research samples, and the environment from harmful biological agents. However, even the most advanced models cannot perform effectively without correct BSC installation and consistent Biosafety Cabinet maintenance.
This comprehensive guide explains everything from types of Biosafety Cabinets to installation requirements, daily upkeep routines, and certification processes. By following these best practices, your laboratory will remain safe, compliant, and efficient.
What Is a Biosafety Cabinet (BSC)?
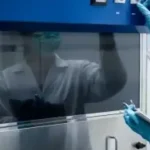
A Biosafety Cabinet (BSC) is a critical piece of laboratory equipment designed to protect personnel, samples, and the surrounding environment from exposure to biological hazards. By using controlled airflow and HEPA or ULPA filters, BSCs create a contained workspace where potentially infectious or hazardous materials can be handled safely.
Different classes of BSCs provide varying levels of protection, depending on laboratory needs and biosafety requirements.
")
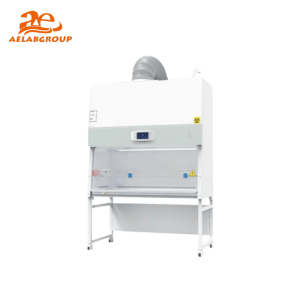
Types of Biosafety Cabinets
BSCs are classified into three main categories:
Class I: Protects personnel and the environment but not the product. Suitable for work with low to moderate-risk agents.
Class II (A1, A2, B1, B2): Protects personnel, environment, and samples. Widely used in microbiology, immunology, and pharmaceutical labs.
Class III: A fully enclosed, gas-tight cabinet providing maximum containment. Used for handling highly infectious or hazardous agents.
They can also be:
Ducted BSCs – exhaust air is vented outside for maximum containment.
Ductless BSCs – air is filtered and recirculated inside, making them cost-effective for lower-risk work.
Correct Installation of a Biosafety Cabinet
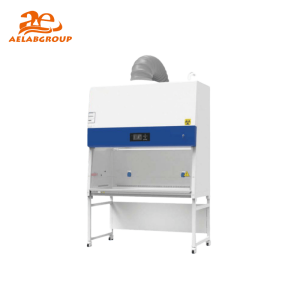
Proper BSC installation ensures safety and efficiency. Poor placement can disrupt airflow and reduce containment.
Key installation guidelines (NSF/ANSI 49:2022):
At least 6 inches (15 cm) from side/rear walls.
40 inches (102 cm) clearance in front.
100 inches (254 cm) between two facing BSCs.
30 cm clearance from ceiling for filter access.
Avoid placing near doors, windows, or high-traffic areas.
")
Always consult your facility’s biosafety officer before installation.
")
Biosafety Cabinet Maintenance Checklist
Regular maintenance ensures optimal performance, regulatory compliance, and prolongs the life of your equipment. Using a structured checklist makes it easier to prevent costly downtime.
Daily Checks
Verify airflow alarms and monitors
Inspect the sash for smooth movement
Wipe down interior surfaces with approved disinfectants
Ensure lights and power systems are operational
Weekly Tasks
Thoroughly clean interior surfaces and drain pans
Check seals, gaskets, and paper catch for wear or residue
Verify airflow velocity against manufacturer’s specifications
Monthly / Quarterly Tasks
Replace pre-filters (typically every 3 months)
Inspect the motor and fan for unusual noise or vibration
Clean blower wheels (if accessible)
Examine electrical components for safety
Annual Professional Certification
Hire a certified technician to perform:
HEPA filter integrity testing
Airflow velocity measurements
Particle count tests
Noise, light, and UV intensity assessments
Recertification for regulatory compliance
")
Why Daily Maintenance of Biosafety Cabinets Matters
Daily Biosafety Cabinet maintenance is essential not just for cleanliness, but also for:
Protecting personnel from pathogens.
Extending cabinet lifespan.
Preventing cross-contamination.
Ensuring compliance with CDC, WHO, and OSHA.
Guaranteeing accurate test results.
")
Daily Maintenance Checklist for Biosafety Cabinet
1. Pre-Operation
Run the BSC for at least 5 minutes before work.
Check airflow indicators and alarms.
Ensure sash height is correct.
Confirm grilles are not blocked.
2. Cleaning and Disinfection
Use 70% ethanol or EPA-approved disinfectants.
Wipe from clean to dirty areas.
Avoid bleach directly on stainless steel.
3. Safe Work Practices
Keep hand movements slow to avoid airflow disruption.
Do not overcrowd the workspace.
Never use open flames.
Place clean and waste materials on separate sides.
4. End-of-Day
Disinfect all surfaces.
Remove waste in sealed bags.
Keep the Biosafety Cabinet running 5–10 minutes post-work.
Close the sash fully.
")
Expert Tips for Long-Term BSC Maintenance
Certify and recalibrate every 6–12 months.
Use UV light only as a supplement, not a replacement.
Train staff regularly.
Follow manufacturer manuals (e.g., AELAB).
Maintain a written BSC maintenance logbook.
Common Mistakes in BSC Maintenance
- Overcrowding the workspace.
- Ignoring airflow alarms.
- Using bleach on stainless steel.
- Leaning inside the Biosafety Cabinet.
- Skipping PPE during cleaning.
")
Daily vs. Periodic Maintenance (Quick Table)
| Type | Frequency | Key Actions |
|---|---|---|
| Daily | Every day | Cleaning, airflow checks, waste removal |
| Weekly | Weekly | Deep cleaning, inspect seals |
| Quarterly | 3–6 months | Replace filters, inspect motor |
| Annual | Yearly | Certification, HEPA test, performance validation |
Conclusion
A Biosafety Cabinet is not just another lab tool—it is a critical defense system against contamination and infection. Correct BSC installation, along with consistent Biosafety Cabinet maintenance, ensures laboratory safety, compliance, and long-term equipment reliability.
Action step: Review your lab’s SOPs today and integrate these BSC maintenance best practices into your routine for maximum safety.