


Introduction: Precision Cleaning Through Sound
How do delicate jewelry, intricate circuit boards, and surgical tools get cleaned without being damaged? The answer lies in ultrasonic cleaning—a revolutionary technology that uses high-frequency sound waves to clean with remarkable precision. Whether used in laboratories, workshops, medical facilities, or the electronics industry, ultrasonic cleaners provide fast, thorough, and non-destructive cleaning for a wide range of items.
This guide combines scientific insights, practical usage tips, and application examples to give you a comprehensive understanding of ultrasonic cleaning.
What Is Ultrasonic Cleaning?
Ultrasonic cleaning is a process that uses ultrasound waves (typically >20 kHz) in combination with a cleaning solution to remove contaminants such as dirt, oil, grease, oxidation, and biological residues. This technique is especially effective for cleaning complex geometries and hard-to-reach areas where traditional methods fall short.

How Ultrasonic Cleaners Work
✅ Key Mechanism: Cavitation
Ultrasonic waves create rapid cycles of compression and rarefaction in the liquid, leading to the formation of microscopic vacuum bubbles (cavitation). These bubbles collapse violently, producing localized jets and shockwaves that dislodge contaminants from surfaces.
Note: Visible air bubbles are not cavitation bubbles—they can actually hinder cleaning. Always degas your solution for optimal results.
⚙️ Three Physical Effects Involved
Cavitation Effect: Bubble collapse releases energy that penetrates crevices and removes contaminants at a microscopic level.
Acoustic Streaming (Straight-Forward Flow): Induced fluid flow that enhances mixing, dissolves oily films, and boosts the rate of contaminant removal.
Acceleration Effect: At higher frequencies (>40 kHz), cavitation weakens, and cleaning power derives from high-speed fluid particle movement impacting contaminants.
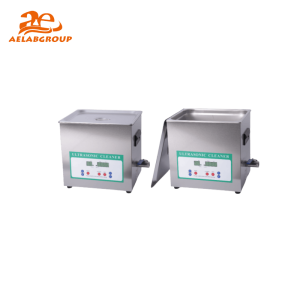
Key Components of an Ultrasonic Cleaner
Cleaning Tank: Holds the cleaning solution and items.
Ultrasonic Transducer: Converts electrical energy into ultrasonic vibrations.
Ultrasonic Generator: Powers the transducer with high-frequency electrical signals.
Heater (Optional): Enhances cleaning performance by raising solution temperature.
Basket or Tray: Keeps items suspended and protects the tank surface.
Ultrasonic Frequencies and Their Applications
| Frequency Range | Cleaning Intensity | Typical Use Cases |
|---|---|---|
| 25–28 kHz | Aggressive | Engine parts, industrial tools |
| 37–45 kHz | Moderate/Gentle | Jewelry, laboratory glassware |
| 80–130 kHz | Delicate | Optical lenses, medical microinstruments |
| 500 kHz–2 MHz (Megasonic) | Ultra-Delicate | Microelectronics, MEMS, silicon wafers |
Lower frequencies create larger bubbles = more forceful cleaning.
Higher frequencies produce smaller bubbles = gentler action.
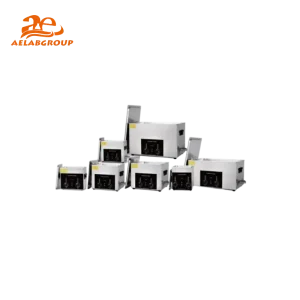
Types of Ultrasonic Cleaners
Single-Tank Units: Standard for general use in labs, clinics, and jewelry stores.
Multi-Tank Systems: For industrial use, offering separate tanks for cleaning, rinsing, and drying.
Rod Transducers: Portable emitters for custom-shaped tanks or containers.
Step-by-Step: How to Use an Ultrasonic Cleaner
Read the Manual: Follow manufacturer-specific guidelines.
Set Up Safely: Place on a stable, flat surface and ensure grounding.
Fill the Tank: Use a suitable water-based cleaning solution.
Degas the Solution: Run the unit empty for 5–10 minutes.
Prepare Items: Disassemble and remove loose debris.
Load Items Properly: Use a basket; avoid overcrowding.
Set Parameters: Adjust frequency, temperature (70–80°C), and time (3–15 min typical).
Start Cleaning Cycle: Monitor and adjust as needed.
Rinse and Dry: Use clean water, then dry with air or a drying oven.
Clean the Unit: Rinse and wipe the tank regularly to prevent buildup.

Top Applications Across Industries
🧪Laboratories & Biotech
Cleans flasks, pipettes, test tubes.
Removes dust, oil, polishing residues.
Saves manual effort and time.
💻 Electronics
Cleans PCBs and connectors.
Eliminates fine dust, solder residues.
Prevents short circuits and oxidation.
⚙️ Mechanical Parts
Ideal for gears, valves, engine parts.
Removes oil, rust, and fine metal dust.
💍 Jewelry & Watches
Restores shine to precious stones.
Reaches under settings and fine designs.
🏥 Medical & Dental
Pre-sterilization cleaning of surgical instruments.
Safe for complex and reusable devices like endoscopes.

Advantages of Ultrasonic Cleaning
✅ Non-destructive: Safe for fragile or delicate items
✅ Deep cleaning: Reaches into blind holes and small gaps
✅ Efficient: Fast, repeatable, and automated
✅ Eco-friendly: Reduces the need for harsh chemicals
✅ Versatile: Works across industries and materials
Limitations to Consider
⚠️ Not suitable for porous or absorbent materials (e.g., pearls, soft plastics)
⚠️ Misuse can damage sensitive electronics
⚠️ Requires proper setup and regular maintenance
⚠️ Cross-contamination if solution is not changed regularly
Best Practices and Safety Tips
Avoid Direct Contact: Always use a basket; don’t rest items on the tank bottom.
Use Compatible Solutions: Avoid flammable or corrosive chemicals.
Test Cavitation Performance: Use aluminum foil test for quality checks.
Replace Solution Regularly: Dirty solution reduces effectiveness.
Protect Electronics: Avoid cleaning sensitive components like gyroscopes or sensors unless frequency and timing are tightly controlled.
Conclusion: A Smart Investment in Cleanliness
Ultrasonic cleaning offers a powerful combination of precision, efficiency, and versatility. By understanding the science behind it and applying best practices, users can achieve results that far surpass traditional methods—safely and consistently.
Whether you’re operating a lab, clinic, manufacturing line, or jewelry shop, investing in the right ultrasonic cleaner is a strategic move toward improved hygiene, performance, and operational quality.


One Response
Nice, practical overview of ultrasonic cleaning. The points about cavitation, proper degassing, and matching frequency/power to the part and soil type are what make the difference between “it ran” and “it actually cleaned.” The best-practice reminders on bath chemistry, loading, and consistent process control are especially useful. Best regards.